Showing posts with label Great for the Freezer. Show all posts

Wednesday, March 5, 2014

Ham & Swiss Casserole

Tonight I tortured the family with a new recipe and it went better than expected--despite issues with a particular ingredient.  You see, the original recipe calls for cream of celery soup. This particular soup is persona non-gratis in this house, no one likes it. I am willing to bet even the dog would turn up her nose to this creamy toxicity.

As I was leaving the house this afternoon to pick up Miss M from school I took a quick peek over at my storage shelves in the garage. From the driver seat of the mom-mobile it appeared we had the cans of cream of mushroom I planned as a substitute. I made a point of my quick check because I was planning to brave the commissary after picking up the littlest Wheeler. (We survived the trip to the commissary because I gave Miss M the job of crossing things off mom's list.)

After returning home and putting away the groceries I decided to start dinner. Out to the garage I go to retrieve my cream of mushroom soup. A quick look to the bottom of the can I discover that soup expired in 2010! Yikes! Peel the label off for the Campbell soup points for the PTO and back out to the garage for the last can of cream of mushroom soup. Checking the bottom of that soup I learn it expired in 2011. Growling I remove that label for the PTO and stomp out to the garage. My choices now are cheddar soup or cream of chicken. I grab both cans of the cheddar soup, surely one of those has yet to expire. Wrong. One expired in 2011, and the other in 2009. Not only is throwing four cans of soup in the garbage sad, but add to it the fact that at least one of those cans of soup made the move from Utah to South Korea and then back again. I really need to 1) come up with a better system rotating can goods, 2) check expiry dates on can goods BEFORE the packers come to pack us for a move, and 3) check them again when unpacking. I suppose the best option would to channel my friend Denise, she makes her own cream of *fill in the blank* soups for use in casseroles.

After the great soup massacre, my only choice was to use cream of chicken. That soup is a common one used around here so I KNEW none of those were expired.  I did worry about how the cream of chicken soup would taste in a ham dish. It proved to be a mute point as I received a thumbs up from Hero and a double thumbs up from Miss M.

Below is the recipe, as always changes and thoughts are in red.


Ham & Swiss Casserole
  • 8 oz. package of egg noodles (The egg noodles in our commissary are in 12 oz. pkgs, so I just used the whole package.)
  • 2 cups cubed ham (I found my ham in the meat section already cut, the packages were 8 ozs., so I used two for this recipe.)
  • 1 can cream of celery soup (After discovering almost all of my "Cream of" soups had expired, the only option left was to use cream of chicken, turned out just fine.)
  • 2 cups shredded Swiss cheese.
  • 1 cup of sour cream
  • 1/2 cup diced green pepper (I only had red, yellow, and orange in the crisper, so I used the orange one.)
  • 1/2 cup diced onion
  1. Boil the noodles according to the directions on the package. Drain, rinse and set aside. 
  2. In a bowl mix together the soup, sour cream, pepper, and onion.
  3. Grease a 13"x9" baking dish, I use Pam and just spray the pan while on the inside of the open door of the dishwasher this way the next time I run the dishwasher any over spray is washed away. Just make sure your dishwasher is empty of any clean dishes. 
  4. Layer the bottom of the pan with half the noodles.
  5. Add half the ham and then half the cheese.
  6. Spread half of the soup mixture. 
  7. Repeat with the second half of ingredients. 
  8. Bake uncovered at 350*F for 30 to 45 minutes until heated through. 
Final thoughts: This made a rather large casserole for my small family. In the future I will make this dividing the recipe into 2-8"x 8" pans--one for that night and the other for the freezer. Keep in mind that when reheating frozen pasta it tends to get mushy, so under cook the pasta just a bit to help prevent this. Also, instead of layering the ingredients I will mix them with half the cheese, putting that into the dish and then topping with remaining cheese. By layering we found that some of the noodles on the bottom and around the edge became hard and not that yummy lasagna corner hard either. I might even add a vegetable such as peas or broccoli the next time. The final change I will make is using perhaps two cans of soup or adding just a bit of milk to make sure there is enough sauce to coat all the pasta. 

Enjoy!


Monday, January 16, 2012

Mini Meat Loaves

I  have an obsession with love recipes, recipe blogs, cookbooks. Many hours are easily spent trolling the Internet for the next new recipe to try--the next recipe my family will enjoy. When we first arrived in South Korea and moved into our home we did not have fast Internet, I was using my cell phone as a hot spot. It worked, but not as fast as my mind switches gears. Therefore, I discovered the cookbook section at the library on base--much to my husband's delight. See, book checked out of the library means that (1) I didn't spend money and (2) it eventually has to go back and thus keeps my cookbook obsession under control. One day while perusing the shelves I stumbled upon Betty Crocker Quick & Easy Cookbook, I swear promise, I saw the heavens part, a ray of light shone down on this enormous spiral bound book and just dared me to take it home. To appease the culinary gods I checked out that immense cookbook and about 4 of her best friends. Why only 9? Because the library has a limit on the number of books you can check out once and I had to let the kid get a few books too. *sigh*

Anyway, from that book I stumbled upon a few recipes I would be willing to use my family as guinea pigs for--this is one of them. I made them for the first time a few months ago. We ate them for dinner one night and I froze the rest into packages of three for future meals. Now three months later we are out of mini meat loaves in the freezer, so, it's what's for dinner tonight. As always my thoughts and changes are in red.

Mini Meat Loaves
Prep Time: 10 minutes  Start to Finish: 30 minutes  
6 servings(2 loaves each) My husband can eat two loaves, Meghan and I share a loaf.

  • 1/2 cup ketchup
  • 2 Tbsp packed brown sugar
  • 1 lb. lean ground beef (at least 80%) since this recipe also has ground pork I spent the big bucks and got the really lean ground beef
  • 1/2 lb. ground pork 
  • 1/2 cup Original Bisquick mix 
  • 1/4 tsp pepper
  • 1 small onion, chopped (1/4 cup) (I don't know where they found their small onion, but I have NEVER come across a small onion that only yielded a 1/4 cup when chopped...just saying)
  • 1 egg
  • Garlic....must have garlic, I minced two cloves for this amount. Tonight I will be doubling this recipe and will most likely do four to five cloves, but we love our garlic.
  1. Heat oven to 450*F. In small bowl, stir ketchup and brown sugar until mixed; reserve 1/4 cup for topping. In large bowl, stir remaining ingredients and remaining ketchup mixture until well mixed.
  2. Spray 13 X 9-inch pan with cooking spray. (I just take my cookie sheet and cover it with tin foil so when I am done cooking I can toss the foil. I know wasteful and increasing my carbon footprint, but as I have already said a couple of times--I am lazy.) Place meat mixture in pan; pat into a 12 X 4-inch rectangle. Cut lengthwise down center and then crosswise into sixths to form 12 loaves. Separate loaves, using spatula, so no edges are touching. Brush loaves with reserved 1/4 cup ketchup mixture.
  3. Bake 18 to 20 minutes or until loaves are no longer pink in center and meat thermometer inserted in center of loaves reads 160*F.
Tonight I am going to serve this with garlic mashed potatoes, I TOLD you we love our garlic, and either a salad or green beans. I also have some lovely Korean pears, I might cut one of those up...my mouth waters just thinking about it.


Enjoy!

Saturday, January 23, 2010

Beans and franks bake

We had this for dinner the other night and it was almost a hit with everyone, Phillip wasn't too fond of having the corn bread on top. The extra casserole I put in the freezer does not have the corn bread batter on top, we will baking corn bread separately.

I got this recipe from a "Taste of Home" cookbook that you can find at the checkout counter. I love those and used to have a serious addiction to collecting them. I have managed to cut my impulse to buy new cookbooks drastically much to my husband's delight.

Yields: 2 Casseroles (4 servings each) (This casserole fed my family two meals)
  • 2 packages (8-1/2 ounces each) corn bread/muffin mix (the recipe doesn't say this, but be sure you have the ingredients needed to mix the corn bread and follow the directions on the package.)
  • 1 can (28 ounces) baked beans(I did not have baked beans on hand so I just used Pork n' beans, I am glad I did because if I had used baked beans it would have been too sweet for my family)
  • 4 hot dogs, halved lengthwise and sliced (I used a whole package of hot dogs and just sliced them, we like hot dogs)
  • ½ pound sliced bacon, cooked and crumbled
  • 1 cup ketchup
  • ½ cup packed brown sugar
  • ½ cup chopped onion
  • 2 cups(8 ounces) shredded part-skim mozzarella cheese
  • The recipe does not call for this…but we like a little bit of mustard in our baked beans, the next time I make this recipe I will either put in a couple of tablespoons of prepared mustard or about 1 teaspoon of dry mustard in the mixture.
  1. Prepare corn bread batter according to the package; set aside. In a large bowl, combine the beans, hot dogs, bacon, ketchup, brown sugar, and onion. Transfer to two greased 8-in. square baking dishes. Sprinkle with cheese; top with corn batter.
  2. Cover and freeze one casserole for up to 3 months. Bake the second casserole, uncovered, at 350° for 40-45 minutes or until a toothpick inserted near the center comes out clean.

    To Use Frozen Casserole: Remove from the freezer 30 minutes before baking. Cover and bake at 350° for 40 minutes. Uncover; bake 15-20 minutes longer or until heated through.

Thursday, January 14, 2010

Cheddar Turkey Bake

Cheddar Turkey Bake

Another wintry day, another casserole…

This is another "Taste of Home" recipe.

Yield: 2 Casseroles (4-6 servings each)
  • 2 cups chicken broth
  • 2 cups water
  • 4 teaspoons dried minced onion
  • 2 cups uncooked long grain rice
  • 2 cups frozen peas, thawed
  • 4 cups cubed cooked turkey ( I used two breasts)
  • 2 cans (10-3/4 ounces each) condensed cheddar cheese soup, undiluted
  • 2 cups milk
  • 1 tsp salt
  • 2 cups finely crushed butter-flavored crackers (about 60 crackers) (I just used crackers we had in the house, the wheat Sociables. It took about one full sleeve of crackers per casserole.)
  1. In a large saucepan, bring the broth, water, and onion to a boil. Reduce heat. Add rice; cover and simmer for 15 minutes. Remove from the heat; fluff with a fork.
  2. Divide rice between two greased 9-in. square baking pans. Sprinkle each with peas and turkey. In a bowl, combine the soup, milk, and salt until smooth; pour over turkey. Toss the cracker crumbs and butter; sprinkle over the top.
  3. Cover and freeze one casserole for up to 3 months (if you vacuum seal your casserole after it is frozen it will last longer). Bake the second casserole, uncovered, at 350F for 35 minutes or until golden brown.
To Use Frozen Casserole: Thaw in the refrigerator for 24 hours. Bake uncovered, at 350F for 45 – 50 minutes or until heated through.

Enjoy!

While we enjoyed this recipe I will be making the following changes the next time I make this recipe:
  • I will use three cans of soup instead of two, and keep the milk at 2 cups
  • I will be bringing some more flavor to the party with some garlic powder and a few shakes of pepper sauce into the soup mixture.  We love flavor in this house, bland is a bad word!
  • Instead of layering the rice, meat, peas, and soup I will be mixing them in a large bowl and then dividing it between my two pans.
  • I will be adding some shredded cheese, most likely cheddar to the mixture.
  • Lastly, Phillip thinks it would taste better if made with chicken or pork.

Thursday, January 7, 2010

Chicken Stuffing Casserole

Chicken Stuffing Casserole
"Taste of Home" recipe
Yields: 2 Casseroles(6 servings each)
  • 2 packages (6 ounces each) chicken stuffing mix
  • 2 cans(10-3/4 ounces each) condensed cream of mushroom soup, undiluted
  • 1 cup of milk
  • 4 cups cubed cooked chicken
  • 2 cups frozen corn
  • 2 cans (8 ounces each) mushroom stems and pieces, drained (canned mushrooms are food non gratia in this house, so I just rough chopped a couple handfuls of button mushrooms)
  • 4 cups shredded cheddar cheese
  1. Prepare stuffing mixes according to package directions.  Mean while in a large bowl, combine soup and milk; set aside.  Spread the stuffing into two greased 8-in. square baking dishes.  Layer with chicken, corn, mushrooms, soup mixture, and cheese.
  2. Cover and freeze one casserole for up to 3 months.  Cover and bake the second casserole at 350F for 30 - 35 minutes or until cheese is melted.
  3. To use frozen casserole:  Remove from the freezer 30 minutes before baking(do not thaw).  Bake at 350F for 1-1/2 hours.  Uncover; bake 10-15 minutes longer or until heated through.
This is tonight's dinner, so I will let you know how it goes.

Enjoy!

Chicken and Cheese Crescent Chimichangas

This one is just for you Faith...sorry it took me so long....

Chicken and Cheese Crescent Chimichangas
from the "Pillsbury Bake-Off," May 2005, page 52

And as usual any changes or notes will be in red


Serves:  8  Prep:  20 minutes  Start to Finish: 45 Minutes (took me a little over an hour, but I am slow and meticulous) 

  • 3 TBsp vegetable oil (I used olive oil)
  • 1/2 cup chopped onion (1 medium)
  • 2 cloves garlic, minced (I used one heaping serving spoon of the chopped garlic that comes in a jar, I know that is a LOT, but we love us some garlic in this house.)
  • 2 1/2 cups shredded cooked chicken (Now be inspired don't just boil your chicken in plain water!  Bring some flavor to the party, I added garlic, onion, celery, rosemary.....)
  • 2 cans (8oz. ea) Pillsbury refrigerated crescent dinner rolls.  (I used the new big and fat ones so I ended up using three cans, but it's all good we are carb feigns as well as garlic lovers)
  • 1/2 cup Old El Paso Thick'nChunky salsa (I needed more than that, way more, closer to a cup.  I also used the Pace Picante I had in the fridge, use the salsa that floats your boat.)
  • 2 cups shredded cheddar cheese (I used more than recipe called for...what can I say, we also love cheese)
  • Sour Cream and more salsa as garnish


  1. Heat oven to 350.  Grease large cookie sheet with shortening.  In 10-inch skillet, heat oil over medium heat.  Add onion and garlic; cook and stir until onion is tender.  Reduce heat to low.  Add chicken; cook, stirring occasionally, until heated through.
  2. Separate dough into 8 rectangles; firmly press perforations to seal.  Spread about 2 tsp. of salsa on each rectangle to within 1/2 inch of edges.  Stir one cup of the cheese into the chicken mixture. (I didn't do that, I just topped the chicken mixture with a big pinch of cheese before rolling up into the dough.)  Spoon heaping 1/3 cup chicken mixture onto half of each rectangle.  Starting with short side topped with chicken, roll up; pinch ends to seal.  Place seam side down on cookie sheet.
  3. Bake 16 to 21 minutes or until golden brown.  Remove from oven.  Top each with about 2 TBsp of the remaining cheese.  (I only topped the three we would be eating that night as I was putting the rest in the freezer.  I ended up with 9 chimichangas.)
  4. Return to oven; bake 1 to 2 minutes longer or until cheese is melted.  Serve with sour cream and additional salsa.
Even our two-year-old daughter enjoyed this meal.  I hope your family enjoys it as well.


Thursday, February 12, 2009

Elaine's Sweet and Tangy Loose Beef


I got this recipe from www.allrecipes.com. That is one of my favorite recipe websites. It allows you to adjust the ingredient list to suite the serving size you need. I cut the recipe as you see it in half.

Prep Time: 15 Minutes Cook Time: 10 Hours Servings: 28

Ingredients:
  • 7 pounds beef chuck roast
  • 1 cup water
  • 3 TBsp white vinegar
  • 4 TBsp brown sugar
  • 2 tsp dry mustard
  • 4 TBsp Worcestershire
  • 3 cups ketchup
  • 2 tsp salt
  • 3/4 tsp ground black pepper
  • 1/4 tsp cayenne pepper
  • 6 cloves garlic, minced
Directions:
  1. Place the roast into a slow cooker along with the water. Cover, and cook on LOW for 2 to 4 hours, or until beef can be easily shredded with a fork. (I found that after 6 hours my roast was still hard to shred. So either my slow cooker is about to go capoots or my raost was just a rough cut of meat. Next time I think since I am up until 1am anyway, I will just put the roast on low all night long.)
  2. Shred the beef, removing fat as you go. REmove 1/2 cup of the broth from the slow cooker, and reserve for later. Add vinegar, brown sugar, dry mustard, Worcestershire sauce and ketchup. Mix in the salt, pepper, cayenne, and garlic. Stir so that the meat is well coated.
  3. Cover, and continue to cook beef on low for an additional 4 to 6 hours. Add the reserved broth only if necessary to maintain moisture. Serve on toasted buns. The meat can be frozen for future use.
After our dinner I sealed the remaining BBQ beef in Food Saver bags. When we want BBQ beef again we just put a pouch in boiling water, let boil for a few minutes. If you boil frozen it takes a little longer. Cut pouch and serve....easy peasy!

Thursday, December 4, 2008

Mexican Lasagna

I got this recipe from www.sparkpeople.com, you can find the recipe here. This is another of our favorite meals that we enjoy eating and freezing.

As in the past, I will notate the changes we make to the recipe in RED.


  • 1 lb. ground turkey (I use lean ground beef because Phillip doesn't like ground poultry.)
  • 1 tablespoon olive oil
  • 3 garlic cloves, minced (Today I used 5 cloves, but we LOVE garlic in this house)
  • 2 onions, chopped
  • 2 10 oz. cans black beans, drained and slightly mashed (my cans of beans were larger, but that's okay because we like this recipe with more beans, I think the cans I had were 14.5oz) (in the past I have used one can of black beans and one can of Rosarita Black Bean refried beans, and it turned out great)
  • 1 tablespoon chili powder
  • 1 tablespoon ground cumin
  • 2 cups tomato sauce (my can of tomato sauce was 15oz, I figured that was close enough)
  • 1 10 oz. can stewed tomatoes, coarsely chopped (I never seem to have stewed tomatoes in the house when I need them, so I just used diced.)
  • 6 medium whole wheat tortillas (I cut my tortillas in half to enable me to put them in the pan with the cut edges along the side of the pan, therefore getting better coverage)
  • 1 cup low fat shredded cheddar cheese (along with garlic, we LOVE cheese, so I use way more than this, about double if not more)


Directions


1. Preheat oven 350 F.

2. Saute 1 onion, 1 garlic clove on high heat while breaking up meat. Cook until meat is no longer pink. Stir in black beans. Set saute pan aside.

3. Heat oil in another saute pan over medium heat. Saute remaining onion, until soft. Add remaining garlic, chili powder and cumin, saute for 30 seconds. Add tomato sauce and tomatoes with juice. Bring to a boil. Reduce heat to low, simmer partially covered for 20 minutes or until sauce is slightly thickened. Transfer all but 1/2 c (I usually set aside 3/4 cup) sauce to meat and beans; Mix well.

4. Dip half the tortillas, one at a time, in the hot tomato sauce. Lay tortillas in the bottom of an 8.5 x 11 casserole dish.


Spread half meat and bean mixture over tortillas. Sprinkle half the cheese over meat and beans.

5. Add another layer of tortillas and meat & beans mixture. Sprinkle with remaining cheese. Bake 35 minutes or until bubbly and cheese is melted. Let stand 5 minutes. (Today I made the lasagna in the morning, stopping at the I would bake. Instead I put the lasagna in the refrigerator and will bake for about 45 minutes before serving.)

Serves 6.

Freezer tip: We like to eat on this for two nights, and then freeze the rest. What I do is cut the lasagna into thirds. After the baked lasagna has been in the fridge overnight and before I reheat it I put 1/3 of the lasagna on a sheet of tin foil that I placed on a cookie sheet. Removing the lasagna from the pan works much better if you use two spatulas. I then wrap the lasagna in the tin foil I set it on and place the cookie sheet with the lasagna in the freezer. Usually I let it freeze overnight. The next morning I take the cookie sheet with the frozen lasagna on it out of the freezer and vacuum seal it using my food saver. When I want to eat it, I take it out of the freezer and set it on the counter for about 30 minutes. After the 30 minutes I carefully remove the lasagna from the vacuum sealer bag and the tin foil. Then I place it in a small pan coated with cooking spray. Top the pan with tin foil and put the pan in the refrigerator to finish dethawing.

Hope you enjoy!

Tuesday, November 25, 2008

Taco-Filled Pasta Shells

I got this recipe from the Taste of Home, "No-Fuss Freezer Meals", Fall 2008 book. This recipe comes from a Marge Hodel of Roanoke, Illinois.

I will give the recipe as it is on the recipe card. However, I cut the menu in half to test whether or not we liked it before we make a bunch to freeze. We liked it so I will be making a full batch to put in the freezer for Phillip and Miss M for after I have my WLS.


You will need:
  • 2 pounds ground beef
  • 2 envelopes taco seasoning (we use the low-sodium kind in this house, and I was glad I did, I think it might have been too salty otherwise)
  • 1 package (8 ounces) cream cheese cubed
  • 24 uncooked jumbo pasta shells
  • 1/4 cup butter, melted
Additional Ingredients (for each casserole)
  • 1 cup each salsa and taco sauce
  • 1 cup (4 ounces) shredded cheddar cheese
  • 1 cup (4ounces) shredded Monterey Jack cheese (I just used the Cheddar and Jack blend shredded cheese you can buy in the dairy case)
  • 1-1/2 cups crushed tortilla chips
  • 1 cup (8 ounces) sour cream
  • 3 green onions, chopped
  1. In a Dutch oven, cook beef over medium heat until no longer pink; drain. Add taco seasoning, prepare according to package directions. Add cream cheese, cook and stir for 5-10minutes or until melted. Transfer to a bowl; chill for 1 hour.
  2. Cook the pasta according to package directions; drain. Gently toss with butter. Fill each shell with about 3 tablespoons of meat mixture. Place 12 shells in a freezer container. Cover and freeze up to 3 months.
  3. To prepare remaining shells, spoon salsa into a greased 9-in. square baking dish. Top with stuffed shells and taco sauce. Cover and bake ay 350 degrees Fahrenheit for 30 minutes. Uncover; sprinkle with cheeses and chips. Bake 15 minutes longer or until heated through. Serve with sour cream and onions.
TO USE FROZEN SHELLS: Thaw in the refrigerator for 24 hours (shells will be partially frozen). Spoon salsa into a greased 9-in. square baking dish. Top with stuffed shells and taco sauce. Cover and bake ay 350 degrees Fahrenheit for 40 minutes. Uncover and continue as above.

I forgot to add the tortilla chips. When we sat down to eat I realized I for got them. Phillip just crushed chips over the top of our dinners. I had a bite before he did this, the chips make a difference for the better. I served this over a bed of shredded lettuce...Yummy!

Guess my secret is out of the bag with this picture...I really don't like my food to touch.

Enjoy!

Wednesday, November 5, 2008

Lasagna

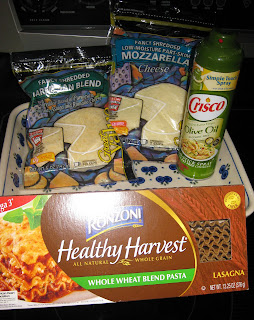
Tonight we are having Lasagna. I am sure everyone has their own special recipe, this is mine.
  • 1 pound of ground beef
  • 1/2 pound of your favorite Italian sausage (Before Meghan we used Hot, now with her eating what we are eating we use Mild)
  • Your favorite Spaghetti sauce
  • One can of petite diced tomatoes
  • Small palm full of your favorite Italian Seasoning blend, mine happens to be Pampered Chef's
In my skillet I brown the meats together. If you buy the sausage in the casing(links) you will need to take them out of the casing before cooking. Just split the casing down the side with a paring knife and then you can turn the sausage out no problem.

*I like my lasagna chunky and full of yummy vegetables like carrots, zuchinni, onions, bell peppers, and mushrooms. However my husband doesn't like chunky, so sometimes I take all of my favorite veges and pulse them in the food processor until they are small bits, then I add that to the sauce. Just remember that it doesn't take much of each vege you add since you are making them small. Tonight I am not doing that because I am feeling LAZY.

Once I have my meat mixture browned and drained of the fat I add my spaghetti sauce. I buy the stuff in the cans because to me it tastes just as good as the stuff in the jars, is cheap, and I can doctor it up to suit my taste buds. Then I add the can of petite diced tomatoes, I use those because as I mentioned my husband isn't into the chunky. Finally I add a small palm full of my favorite Italian Seasoning. Turning the heat as low as it can go I leave that to simmer while I move on to my Ricotta cheese mixture.
  • 1 15oz. tub of Ricotta Cheese
  • 1 egg
  • palm full each of grated Parmesean and Romano cheese
  • small palm full of Mrs. Dash Garlic & Herb seasoning


Combine the five ingredients above in a bowl. Set aside.

  • Your favorite 9x13 pan
  • cooking spray
  • Lasagna noodles
  • Shredded Mozzarella Cheese
  • Shredded Parmesean Blend
*If you have a package of Italian 5 Cheese blend, you can use that instead of the other cheeses.

Spray your pan with your cooking spray. When I am spraying a baking dish with cooking spray I put the dish on the inside of my dishwasher to spray that way any spray over gets washed away with the next load. Just make sure the dishwasher is empty of has dirty dishes in it, you don't want to spray your clean dishes with cooking spray.

My precious daughter, Miss M helping mommy

La
yer about 1/4 of the meat mixture in the bottom of your pan. Now here is the cool part, I haven't cooked my noodles since long before those no cook noodles became the rage. I use regular noodles, or whole wheat in our case, and just make my lasagna in the morning to allow my noodles time to absorb some liquid. My pan allows me to lay 4 noodles across the pan lengthwise.
Laddle just enough of the meat and sauce to cover your noodles. Dot the meat and sauce with about 1/2 of the ricotta cheese mixture. I use my fork to spread out the ricotta cheese out a bit.


Sprinkle the top of the ricotta cheese mixture with about a handful of the shredded cheeses. If you like cheesy, use more, if you don't use less.

Do another layer of noodles, meat sauce, ricotta cheese mixture and the shredded cheeses. Then top off with the last layer of noodles and the remaining meat sauce. I like to sprinkle the top of my lasagna with a lot of the shredded cheeses.


I started this lasagna at about 10am, and by noon it was done and ready to hang out in the refrigerator until time to bake it. Usually it doesn't take me that long, but with referring a toddler and a puppy....well you get the idea.

When it came time to bake the lasagna I took it out of the refrigerator about 30 minutes before I wanted to bake it to let it start coming up to room temperature....I know, I know the food police are going to be busting down my door any minute now.

Pre-heat your oven to 350 degrees. Put your tin foil covered lasagna in the oven once the oven reaches temperature. Bake for 45 minutes with the foil on, then remove the foil and bake for another 15 minutes.

My husband likes this much better the second evening....must be a pasta thing. To reheat, bake at 350 for 45 minutes or until warmed through.

Freezer tip: We like to eat on this for two nights, and then freeze the rest. What I do is cut the lasagna into thirds. After the baked lasagna has been in the fridge overnight and before I reheat it I put 1/3 of the lasagna on a sheet of tin foil that I placed on a cookie sheet. Removing the lasagna from the pan works much better if you use two spatulas. I then wrap the lasagna in the tin foil I set it on and place the cookie sheet with the lasagna in the freezer. Usually I let it freeze overnight. The next morning I take the cookie sheet with the frozen lasagna on it out of the freezer and vacuum seal it using my food saver. When I want to eat it, I take it out of the freezer and set it on the counter for about 30 minutes. After the 30 minutes I carefully remove the lasagna from the vacuum sealer bag and the tin foil. Then I place it in a small pan coated with cooking spray. Top the pan with tin foil and put the pan in the refrigerator to finish dethawing.

Hope you enjoy!